Ensuring the integrity of your automatically captured data
Written by Jason on July 2, 2013When our users look to automate their Internet data capture needs, a common question is how can they ensure a dataset's integrity. After all, when you're importing data manually, you see what's being captured. Say a web server responded with an error page, it's obvious to a person that there's a problem. To a computer? Perhaps not.
We know that situations like this are a major concern (perhaps THE major concern) for many of you. We offer a number of easy ways to ensure that the data being captured is actually what you intended to be captured. These methods include:
- Content checking - confirm that specific cells match what you saw when you set up the capture
- Pattern matching - ensure that the contents of a cell conform to a user-created pattern
- Data extraction - isolate a targeted portion of an element with regular expressions. No match, no capture.
- Owner approval - review and accept all changes to a dataset before being stored
Let's look at the first item in the list - content checking. This helps you verify that the source contents are complete and well-formed by looking at specific elements in the document. You can select one or more elements in the source data, and for subsequent automated imports, the contents of those elements must match the contents when the data was first imported by you; if they don't, the document is considered invalid.
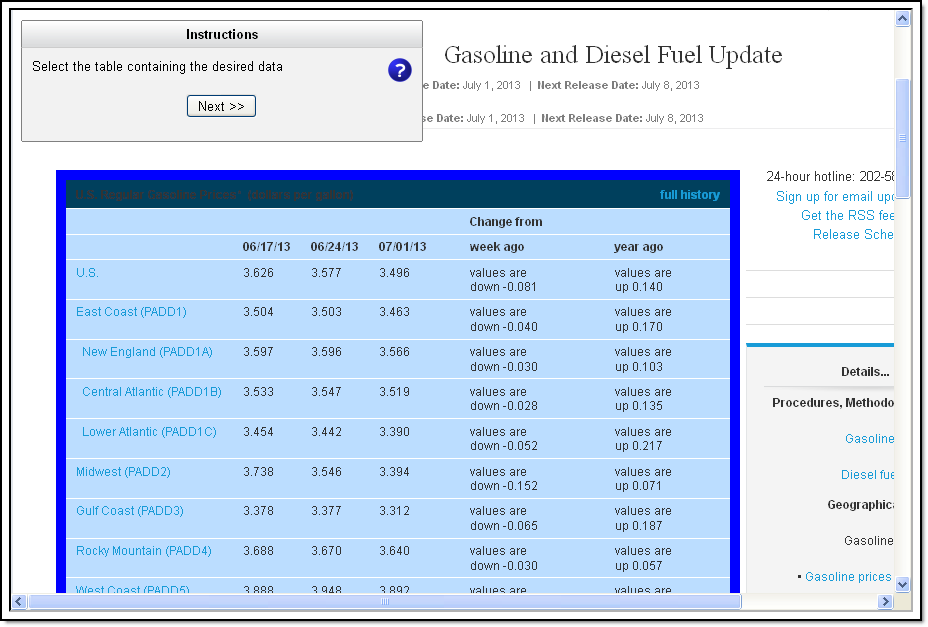
We can show you how easy this is to do using sample data from the US Energy Information Administration (EIA). We'll use a weekly gas price table on their website at http://www.eia.gov/petroleum/gasdiesel/ for the demo.
The gray boxes seen below indicate content checks, and the content within them must be present every time the source data is retrieved. If the content is missing or has changed, the page will not be captured, and if it doesn't appear after a number of retries, you'll be alerted to the situation. This helps you ensure that your source data isn't corrupted (e.g., page not properly loaded) as well as confirm that the source layout hasn't changed (e.g., columns removed or rearranged).
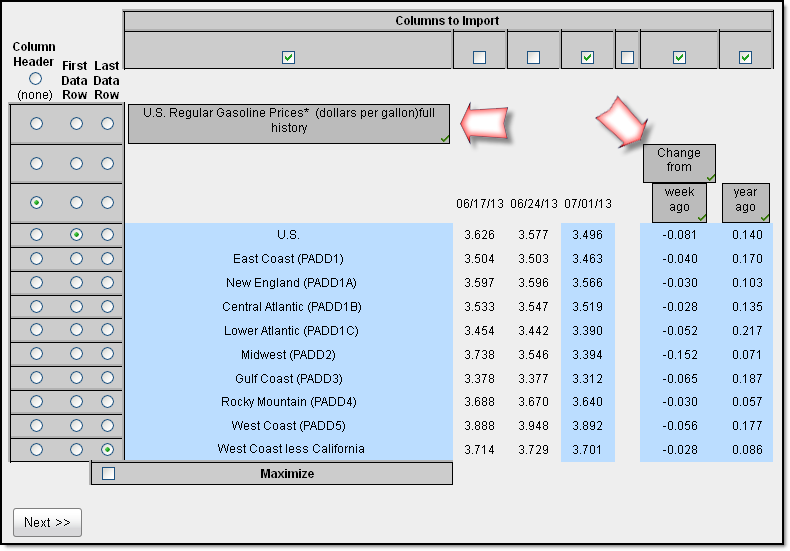
To add a content check in a table-style capture as in our example, click on any cell as you would to capture the data. If you're capturing individual cells as opposed to an entire table, to make the selection a content check, click on the check mark in the box. The usual light blue capture box will change to a grey content check box.
You'll see a summary of your content check cells in subsequent steps.

Content checks are available for all of the Internet-retrieved data sources (including spreadsheets, web pages, XML, and more) in both cell and table capture modes.
Up next, pattern matching.
Pattern matching allows you to check the contents of a field against a pattern, and if it matches, the data in the field is imported; otherwise, it's rejected and that cell is empty. We can also extend this accept / reject behavior to a row level by requiring the tested field to contain valid data (i.e., not empty).
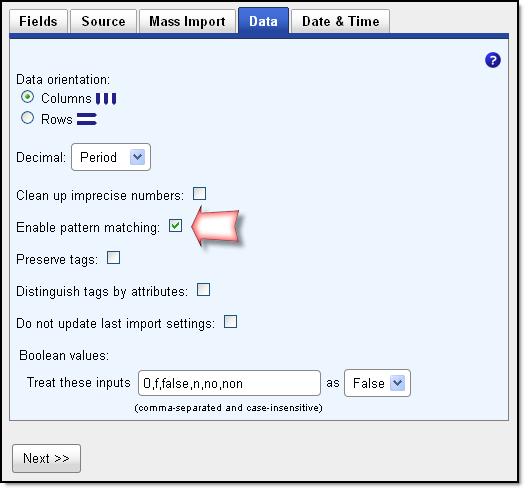
The first thing we'll do is ensure that pattern matching is enabled for our import in step #2.
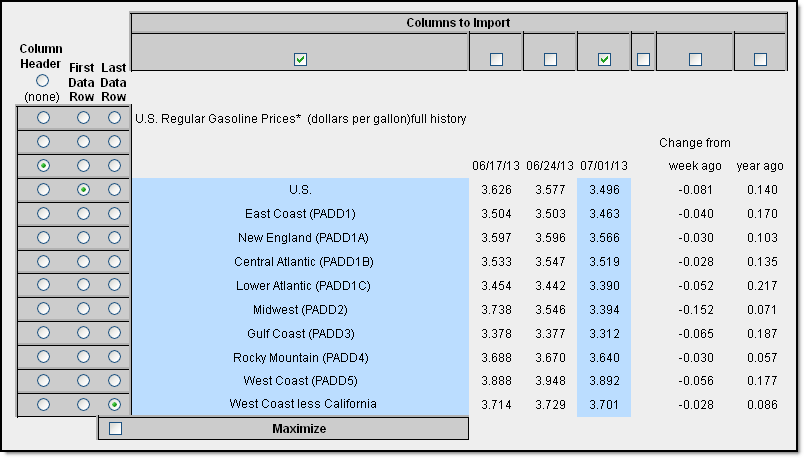
We'll use the same gasoline price data as seen above to demonstrate this functionality. Below, you'll see we've already specified the table to capture and have selected our rows and columns.
We'll name our fields and confirm that the data is stored in the correct format.
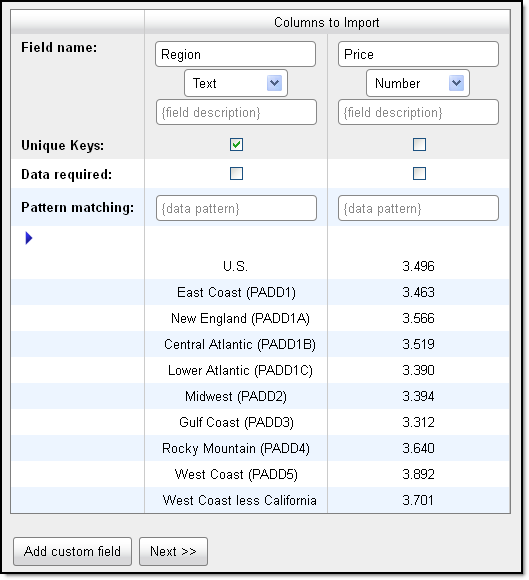
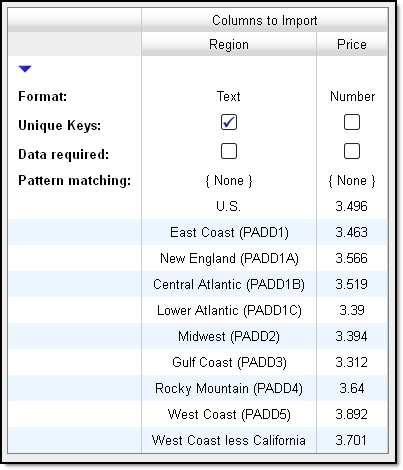
And at the final review step, since we haven't added a pattern to match, all of the rows will be captured.
Let's take a simple example and say we only want to store the price data for the rows that contain "PADD" in the first column and that the rest of the rows are "bad data." We can use a simple pattern match to keep the valid rows and import them, while discarding the others. We'll back up one step.
We'll use the following pattern to accomplish this:
PADD
That is, we want to keep rows where the first column contains the text "PADD".
We'll also check the "data required" box for this column. With these two options set, the characters "PADD" must appear in the field, or the row is discarded.
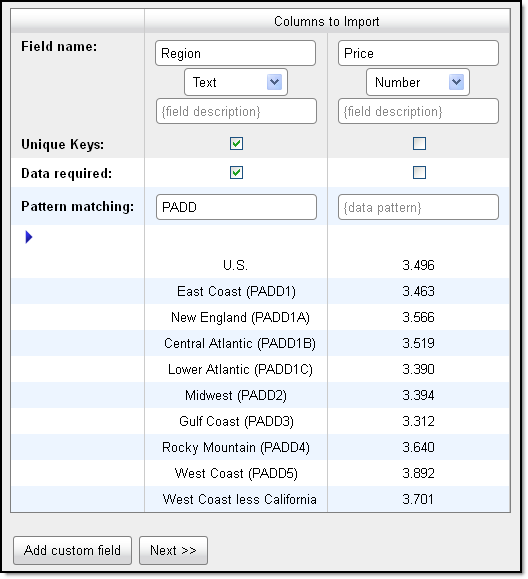
Let's take a look at the next step once the pattern match has been applied:
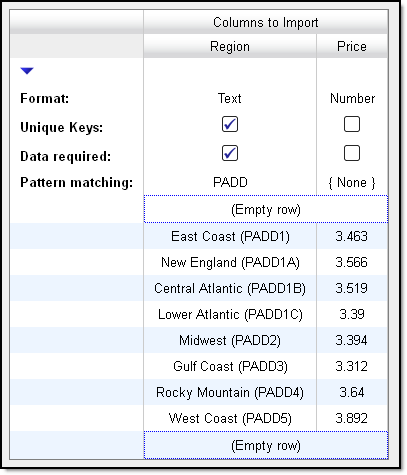
As expected, only the PADD-containing rows remain, while the empty row placeholders indicate where data was discarded.
This was a quick introduction to the first two ways Tuhunga can help ensure your dataset's integrity. Stay tuned for the next part of this series where we'll cover data extraction and owner approval.
UPDATE: Part 2 has been published and can be found here.


